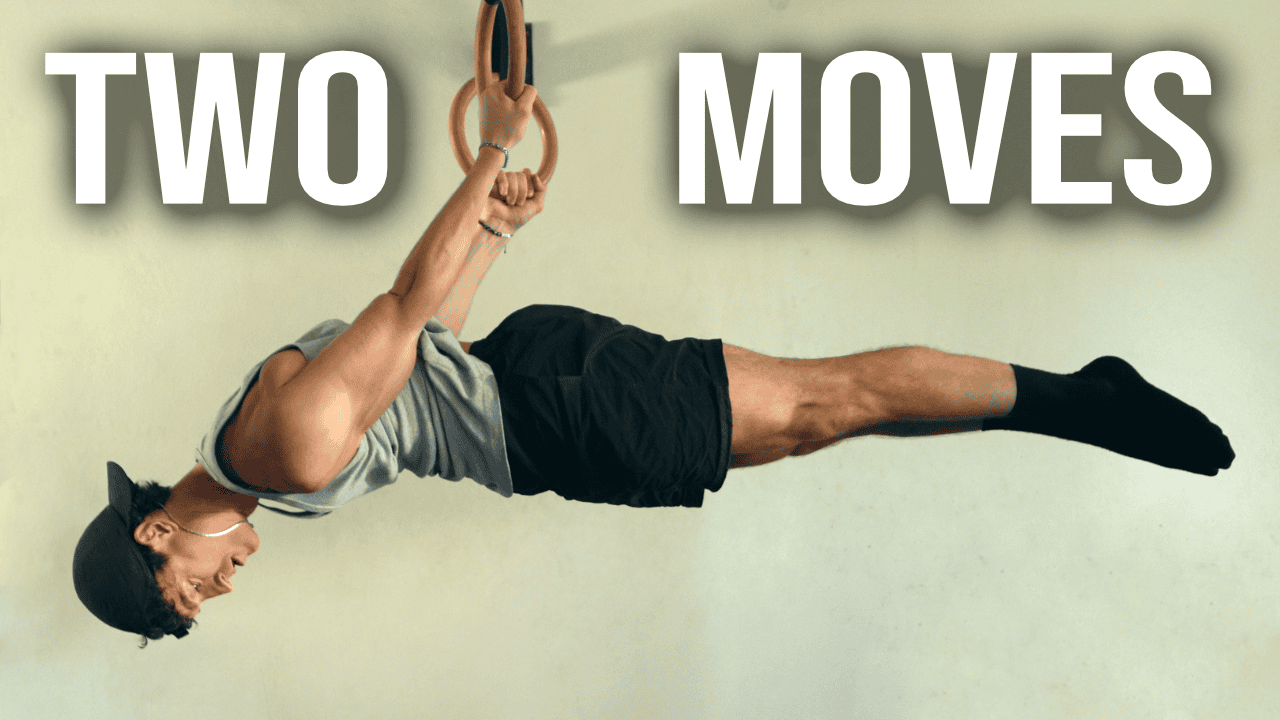
In this video we talk about how to achieve a back lever without ever needing to train it directly. Here’s what we cover:
- The two moves that unlock the back lever for free, while simultaneously building full-body strength, muscle mass and mobility
- The exact strength and mobility requirements you need to hit to unlock it
- How to prep your elbows, shoulders and sternum to avoid injury
- The technique and progressions to learn it once you’re ready
Full transcript
The awesome thing about smart strength training is the amount of skills that you get to unlock for free, requiring no direct work. The back lever is a perfect example of that. I have done zero direct work to train for this, but I can do it no problem. In this video, I’m going to walk you through how I built the ability to do this by working on high leverage movements that built my entire body in just 40 minutes a week that you can train to along with the exact strength requirements that you need to hit to unlock it. I’m going to show you how to properly prepare your joints and prevent injury, which is super important. And then finally, the technique to do this so that once you’re ready, you can add a new skill to the arsenal for free. Calisthenic skills like the back lever are really nice indicators of where your general strength is up to, and they can be fun party tricks to pull out once you have built a certain level of strength in the relevant movements.
The way I train, you’ve got your six basic planes of motion, and as you work your way up through intermediate advanced levels in them, lots of skills like this become attainable. So a free gain move like the back lever, it’s kind of like taking the Lego blocks of strength that you’ve built with your main strength training and rearranging them to form a new skill. Really quick and easy to learn, provided you do have that base of strength. And for the back lever, it’s not super advanced. It’s much easier movement than the front lever, way easier than something like a planche. And most of the required strength comes from training your horizontal pushing. A back lever is essentially like getting to the bottom of your planche pushup and then extending your arms out behind you. So it’s essentially horizontal pushing strength from this bottom position plus some bicep strength to hold your arm in a straight locked elbow position without snapping in half.
So the main strength prerequisite is horizontal pushing. I would say to realistically have the strength to expect to be able to do this, you’d want to get to the point where you can do a bent arm planch. So the bottom of your planch pushup negatives, you get your body completely straight like this. Now, it’s way easier to hold your body straight at the bottom in a bent arm planche than it is at the top in a straight arm planch. So it’s a really good goal to have with your horizontal pushing, especially as you do your negatives to always be reaching to extend out as you lower as much as possible towards this straight body position. Now, the awesome thing about this is that building that strength is going to require you to build a really solid amount of muscle mass in your pecs, in your shoulders, and in this case in your biceps as well.
So there’s just no way that you’re going to be able to unlock back lever strength without building up your upper body to a really solid level. So if you don’t want any muscle gains, then this is probably not the way to go about achieving this. You’re going to have to get a little bit jacked before you’re banging out back levers for zero specific work. So that’s strength. The other thing we want to make sure we’ve got is the stability in this locked elbow straight arm position. There’s going to be a lot of force required in your elbow to keep it stable without hyper extending. So your basket’s going to have to do a lot of work there. The other thing to be wary of is your sternum. I had issues with my sternum early on from training back lever variance, not even the full thing.
You can really easily overload it if it is not adequately prepped. Now, thankfully, there’s one movement that can fix both these issues for you and get you in really good position to be doing back levers without joint issues. And that is one of my old favourite upper body mobility movements, the German hang. If you train your German hangs, as I suggest everyone does, with a supernated grip, meaning you start with your palms facing you like you’re drinking soup and you keep them that way, then you get the double benefits with this of prepping your elbow straight arm position under load and building strength in that deep extended shoulder position, which is essentially replicating the exact stresses that are going to be placed on your body in the back lever position. So as a mobility prerequisite to this, I would suggest to everyone to get a really deep German hang, essentially reach the anatomical limit of your shoulder extension so that you’re hanging more or less vertically with your arms behind you.
Once you can comfortably do that and pull back out of it, then I think you can comfortably say that you have the elbow and shoulder, chest, sternum prep to be ready to comfortably do a back lever without snapping something at your sternum or your bace or elbow. I think a full German hang is a really good mobility target regardless of whether you intend on doing these sorts of callisthenics moves or not. But if this is what motivates you to go and spend a couple months getting it up to scratch, then great. It will serve you really well as you continue to progress your pushing strength regardless of whether that looks like back levers or just getting way stronger at your horizontal pushing. If you can do a bent arm plant for a couple seconds and you’ve got a deep German hang, then you should have everything that you need to do a back lever.
And so all this comes down to is just learning the positioning to use the strength and mobility that you have to do in your skill. With skills practise like this, I would always, always do them at the start of your sessions, whether you be practising handstands, muscle ups, handstand presses, something like a back lever. You always want to do this before your strength training when you have maximum strength and coordination available. As soon as you add in a springling of fatigue from your strength training, you’re going to be performing worse, you’re going to be more likely to hurt yourself, and you’re just not going to be giving yourself the best chance of practising good positioning, which is what skill work is all about. So if you’ve got any goals like this that you’re currently working on, I suggest that at the start of your sessions before you do your strength training, you play around with them.
You’re quickly going to get fatigued by trying them. So if you don’t want your session to blow out into a really long ordeal, then just have one or two goes at it and then get to your strength work. If you do that every time you train, you’re quickly going to be able to learn a handstand, learn back lever, learn whatever it is you want. A lot like mobility, I would just treat skilled work like an extra fun add-on, do one at a time. And if you get sick of it, don’t worry too much. Your strength is the main core of your training always. Remember, this is not strength training. We’re not aiming to build muscle here. We’re just trying to coordinate the strength and the muscle that we already have into performing a new skill. It’s all neuromuscular learning. So keep your efforts at these sorts of things really short, really high quality, and as soon as you’re losing concentration, you’re done.
Call it. Again, if you find you can’t do this, you ditch it for months. It doesn’t matter. Come back when you’re stronger. You’ll probably find it at some point that suddenly it clicks and you’ve got it. So in terms of technique, first thing is your grip. I supinate with this because I think it looks better. That will be a lot tougher on your biases, but if you’ve done the prep work with your German hangs to get that strong, you should be okay. The other option you have is to pronate your wrists so that they’re facing forwards. If you’re not sure, I think pronated is a bit more beginner friendly. And getting into this looks very much like a German hang. You do a skin in the cat, you pull your hips over above you, and then you lower into the movement. Now, if you want to learn the positioning, you can do a very similar process to how you learn to tuck planches and tuck front levers.
You just stay tuck knees to chest and you lower to the point where your hips are level and you practise holding that. I would suggest filming yourself so you can actually see if you are level. And then over time you can practise lowering into progressively harder versions. So you can do an advanced tuck, then you can do a straddle, and then when you’ve got the strength, you can do a full back lever. And once you get it and you can hold it for a few seconds, congrats, you’ve got a new skill and then you can go back to strength training as you were. But if you do unlock this, that’s awesome. Well done. And it should show you just how effective your training is and be really good validation that you are improving physically getting stronger. That’s it. I know I had a few students unlock their first muscle up after watching my previous free gain tutorial, so hopefully this inspires a few of you to hit your first back lever.
If you do, please let me know. We’d love to hear the success stories. If you want help making sure that your training covers all the strength and mobility requirements to unlock skills like this for free, check out our system free training on that linked into the description. If there’s more tutorials you’d like to see, please let me know in the comments. Hope this helps. Makes sense.