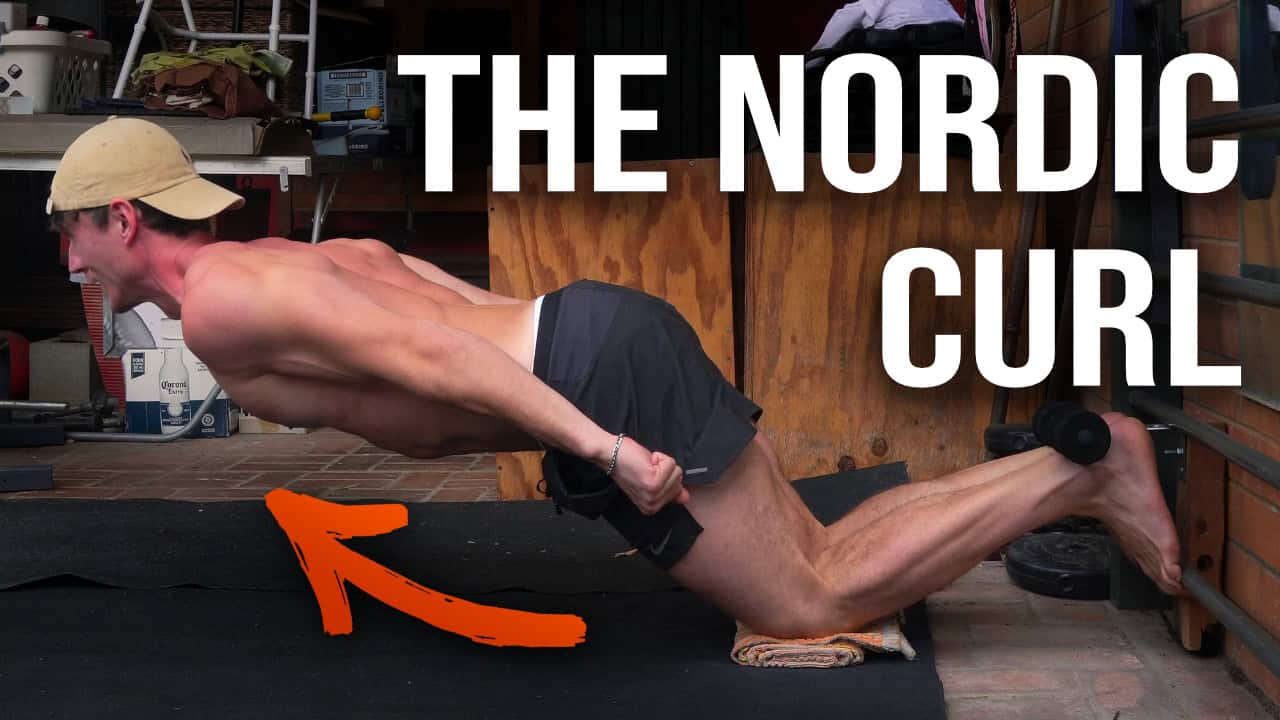
The Nordic Curl
The Nordic curl is one of only six movements that I train. It’s the king of hamstring strength. It covers the back of the knee and is the counter to your squatting strength or the strength we build up from training single leg squats.
Ben Patrick has really popularised this movement for its ability to promote athletic ability, sprint speed, and jump height, because knee flexion (or reverse squatting) often gets neglected by people. Build up to a full Nordic, you are putting yourself in an incredible position for not only preventing injury, but performing as well as possible in all your athletic endeavours. It’s also going to allow you to build your squatting strength and your legs to much, much higher levels by building both flexion and extension in unison.
I’m not yet at a full Nordic—I’ve only been training it the last couple of years. But I have been able to make leaps and bounds in my Nordic curl strength with just two minutes of training each week—one single rep of this movement. And I’m continuing to make consistent gains much, much closer to the full thing. Here’s how you can build your own Nordic curl from scratch, starting at any strength level in about two minutes of training per week.
How to build a Nordic curl from scratch in two minutes a week
Equipment
The gear you need is a bit different to the other movements. For upper body, we use gymnastic strings. For squats, we use some weight vest. For the Nordic curl, all you’ll need is some sort of anchor point that you can lock your heels into that’s able to resist basically your entire body weight worth of force in an upwards direction.
So the simplest solution to this is just to use a Nordic strap which you can chuck under a door, but anything that holds your body in place with enough downwards resistance is fine. If you want to load up a really heavy barbell or use a squat rack that’s fixed to the floor or a balustrade like I’ve got, any of these things can work. If you’re on a hard ground, you also want to pad your knees so you can really drive them into the ground without crushing your kneecaps.
Biomechanics
If you think about the mechanics of a Nordic curl, all it is is a 90º bend at the knee joint. It’s very easy to get confused and think about what your upper body is doing. But all we are doing is flexing the knee from 180º to 90º and then in the negative, extending it back from 90º to 180º. That’s it. So we just want to think about working each degree in between those two endpoints at maximum intensity and loading it as needed to achieve that.
Adjusting the Load
There are basically two ways that we can adjust the load on the knee and make this movement easier or harder, depending on what our strength is allowing us to do.
#1 Hinge the hips
The first is just to hinge at the hips. If we bend at the hip joint and fold our body in half, that reduces the length of the lever and makes the movement easier, takes load off the knee. So that is the first way you can make it easier: Once you start to feel like you’re at a point of failure, you can just bend at the hips.
#2 Use your hands
The other way that you can make this easier is by then putting your hands on the ground and literally just supporting yourself with your arms towards the top of this movement. The first thing you’ll need to do is hinge at the hips because you won’t be able to reach the ground. And then once you’ve hinged, you can use your arms and help yourself.
By combining these two variables, you can scale down the movement as much as needed and literally just guide yourself through the entire 90 degrees with as much help as required. Making the movement harder is then easy because you can just take help away from your hands or extend out at the hips until you’re fully extended.
How to train the nordic curl for fastest possible strength gains
The core principle, as with everything, is that we just want to work this movement at 100% effort at every single point in the rep. So every degree of knee flexion should be a grind to achieve throughout the movement: You should be getting stuck and failing the whole way. On the negative, we want to force ourselves down, actively be trying to bring our heel to our butt, trying to keep ourselves up, and then using the weight of our body to literally force our knee open to pry it open and force the negative all the way down to the ground.
That constant max intensity is how we can achieve all the stimulus we need for this movement with just one rep a week. It only needs to take you a minute or two to really gas yourself, feel like you’re satisfied, and as soon as you are feeling happy with the set and you don’t want to do any more, you’re done for the week. Come back next week and be stronger. It really is that simple.
Key mistake
The key mistake I see with this movement is people not training full range of motion. So they’ll lower a little bit and then get maybe 45 degrees of knee bend, if that, and then they’ll call it and say, “Oh, I’m failing now. I’m done. I can’t finish the rep.”
If we only train partial range of motion, we only gain strength in partial range of motion. We leave a lot of gains on the table. If you’re doing one rep a week, do the complete rep. Go all the way from 90 degrees down to where your hips touch the floor. If your hips don’t touch the floor, you haven’t completed a rep. You haven’t reached full range of motion. It doesn’t count. If you’re going to do one rep a week, make sure that rep is full range to be actually gaining all the strength possible for this movement.
Building your nordic curl
That’s it. That’s how you can train a Nordic curl from scratch, from zero strength all the way up to being able to do the full thing. It really is that simple. I think keep in mind with this progression scheme, it is all about intensity. It’s all about increasing your strength with time by always training at a limit. If you’re seeing your maximum ability go up each week, you’re on track. You just need to keep coming back and you will keep getting stronger until you’re doing the full thing.
Obviously, this movement and training this movement only makes sense in the context of a smart overall training plan. So if you want to learn what that should look like, what other movements you should be training, then read this next.